Deploying a multi node Jenkins 2.0 environment with Docker and CoreOS - Part 2
In the first part of this series we got a Docker Swarm running with Vagrant and CoreOS. In this part we are going to use this Docker Swarm to run a Jenkins 2.0 installation. Jenkins is a continous delivery tool. You can configure jobs to build your projects and deploy them. There are plugins for many build environments available.

Basic Setup
We are going to run Jenkins with docker-compose. This way, it’s much more easy to launch the containers and manage the dependencies between them. Even when only running one container, it’s easier to type docker-compose up then docker run -p80:8080 -p50000:50000 -vdata:/var/jenkins_home jenkins. Start with the following docker-compose.yml file:
version: '2'
services:
    jenkins-server:
        image: jenkins
        ports:
            - "80:8080"
            - "50000:50000"
After running docker-compose up start your browser and go to http://ip-of-vm. Usually http://localhost would be enough. But for our Vagrant based cluster with three vms it’s a little bit more complicated. Docker exposes the ports on the host it is running on. For our environment this means, the port is exposed on one of the virtual machines. To make things more complicated, Docker Swarm decides on which machine our server will run. To find the ip, type in:
> docker ps
CONTAINER ID        IMAGE               COMMAND                  CREATED             STATUS     	   PORTS                                                      NAMES
b96f2778411b        jenkins             "/bin/tini -- /usr/lo"   40 seconds ago      Up 37 seconds     172.17.8.103:50000->50000/tcp, 172.17.8.103:80->8080/tcp   core-03/jenkinstest_jenkins-server_1
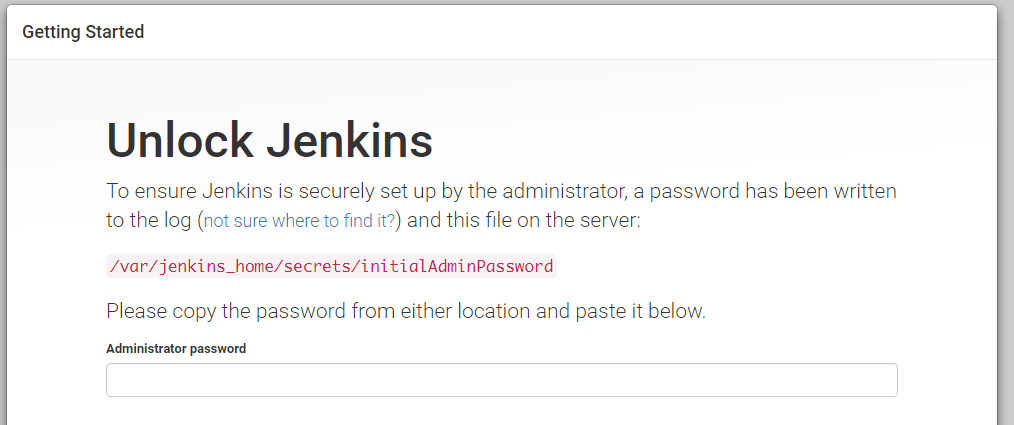
The name core-03/jenkinstest_jenkins-server_1 tells us, that the container is running on core-03. So open http://172.17.8.103 in your browser (use http://172.17.8.101 for core-01 and http://172.17.8.102 for core-02). The following screen shows us, that Jenkins is running and needs to be configured:

The needed password can be found in the output of docker-compose. But wait. We are using Vagrant and Docker to build a reproducible test environment which can be destroyed and recreated at will. And then we configure our Jenkins as SnowflakeServer? I think, we can do better.
Automated Setup for Jenkins 2.0
Let’s first start by persisting our configuration data. The jenkins image stores the configuration in the volume /var/jenkins_home. We do not map this volume right now, so the data is stored within our container. This also means, it is lost when we destroy the container, e.g. by running docker-compose down. Furthermore, the configuration cannot be shared between the different hosts of our Docker Swarm. To solve this problem we are going to store our volume on a NFS share. First enable NFS support in your cluster, if you haven’t done so. You can follow this description Sharing Volumes in Docker Swarm with NFS. Then change the docker-compose.yml file as follows:
version: '2'
services:
    jenkins-server:
        image: jenkins
        volumes:
            - data:/var/jenkins_home/
        ports:
            - "80:8080"
            - "50000:50000"
volumes:
  data:
    driver: nfs
    driver_opts:
        share: "core-01:/exports"
We are mapping the volume /var/jenkins_home/ within the container to a named volume data. This named volume is configured to use the nfs driver and store files on the nfs share core-01:/exports. If you now destroy the jenkins container, only the software is gone. All your data is still there, when you recreate your container later.
The next problem is the configuration wizard. This wizard is comfortable, if you want to manually install a server. But it doesn’t fit well for us. The wizard does two things:
- select and install plugins
- create the first administrative user
Luckily, both steps can be automated. To do so, we are going to customize the base jenkins image. Create an folder jenkins in the directory of your docker-compose.yml file. In this new folder, create the following Dockerfile:
FROM jenkins
MAINTAINER Heiko Hüter <ender@ender74.de>

USER root

ADD basic-security.groovy /usr/share/jenkins/ref/init.groovy.d/basic-security.groovy

USER ${user}

RUN /usr/local/bin/install-plugins.sh git subversion
Create the new file basic-security.groovy with the following content in the same folder:
#!groovy

import jenkins.model.*
import hudson.security.*

def instance = Jenkins.getInstance()

println "--> creating local user 'admin'"

def hudsonRealm = new HudsonPrivateSecurityRealm(false)
hudsonRealm.createAccount('admin','admin')
instance.setSecurityRealm(hudsonRealm)

def strategy = new FullControlOnceLoggedInAuthorizationStrategy()
instance.setAuthorizationStrategy(strategy)
instance.save()
This groovy script will create a Jenkins user admin with password admin. Furthermore it gives this user full control to manage your Jenkins installation. The Dockerfile adds this script to /usr/share/jenkins/ref/init.groovy.d/. The content of this folder is copied to /var/jenkins_home/init.groovy.d/ during initialization and run by Jenkins at first startup.
The last line in the Dockerfile runs the script /usr/local/bin/install-plugins.sh passing the list of wanted plugins as argument. In this example, only the git and subversion plugin is going to be installed.
The last step is to modify your docker-compose.yml file:
version: '2'
services:
    jenkins-server:
        build: ./jenkins
        volumes:
            - data:/var/jenkins_home/
        environment:
            - JAVA_OPTS="-Djenkins.install.runSetupWizard=false"
        ports:
            - "80:8080"
            - "50000:50000"
volumes:
  data:
    driver: nfs
    driver_opts:
        share: "core-01:/exports"
Instead of using the jenkins image, we tell Docker Compose to build the Dockerfile in the ./jenkins folder. The environment entry JAVA_OPTS tells Jenkins to skip the setup wizard entirely.
To test this new configuration, we first need to delete our stored jenkins config. To do so, destroy your running containers with docker-compose down. Then connect to the vm core-01 (vagrant ssh core-01) and type in sudo rm -rf /exports/*.
Now start your container. When you now open Jenkins in your browser, you are greeted with the start page instead of the manual setup wizard:

You can login with admin / admin to work with the System.